

Welcome to the Hatchaholics Vendor Account Setup Tutorial! We’re excited to have you join our community of passionate sellers. This step-by-step guide is designed to help you quickly and easily set up your vendor account, and prepare to showcase your poultry products to eager customers. Whether you’re new to online selling or an experienced vendor, we’ll walk you through every essential detail to get your shop up and running smoothly on Hatchaholics.com.
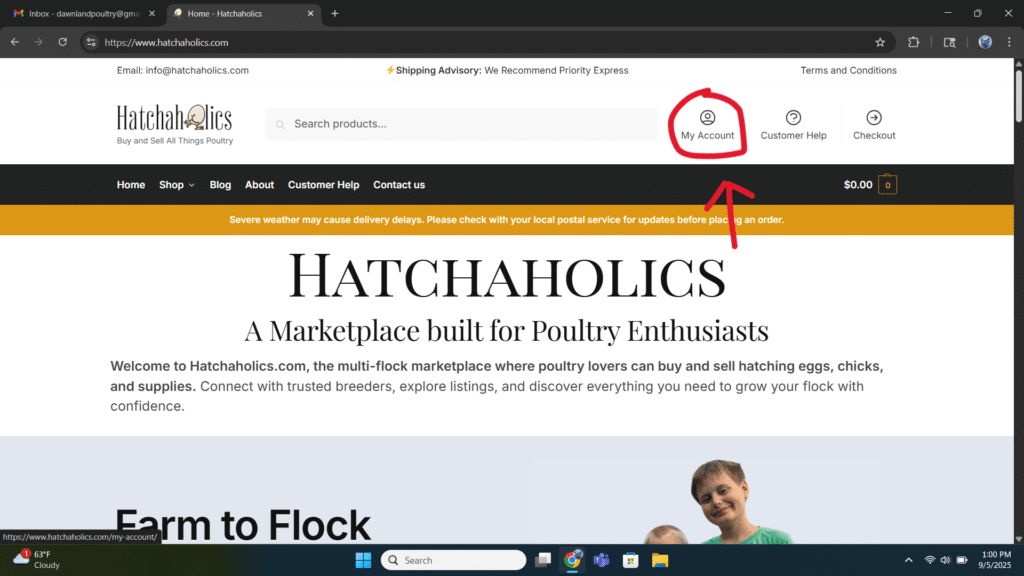
Step 1: Go to the Website Homepage
Select “My Account” in the top right-hand corner of the homepage.
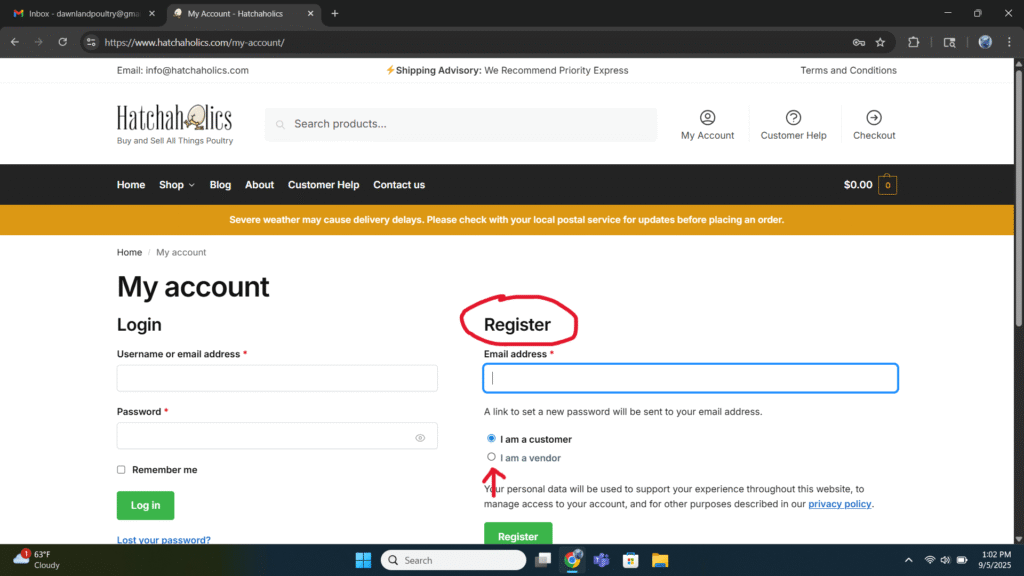
Step 2: Select “I am a Vendor” under “Register”
Select the “I am a Vendor ” option to start creating a seller account.
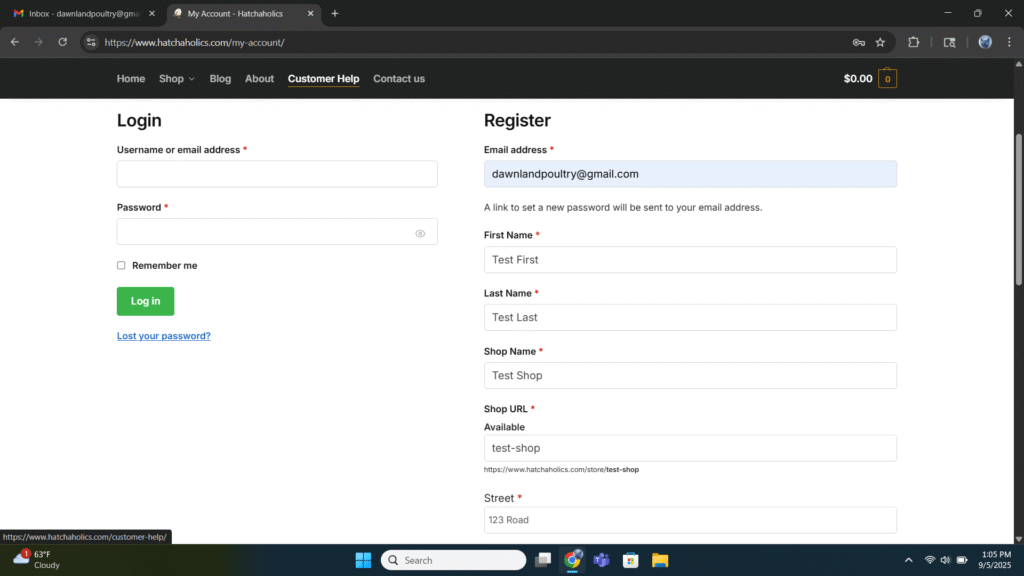
Step 3: Fill in the Required Registration Fields
Fill in the form fields. (Name, Store Name, Address, etc.)
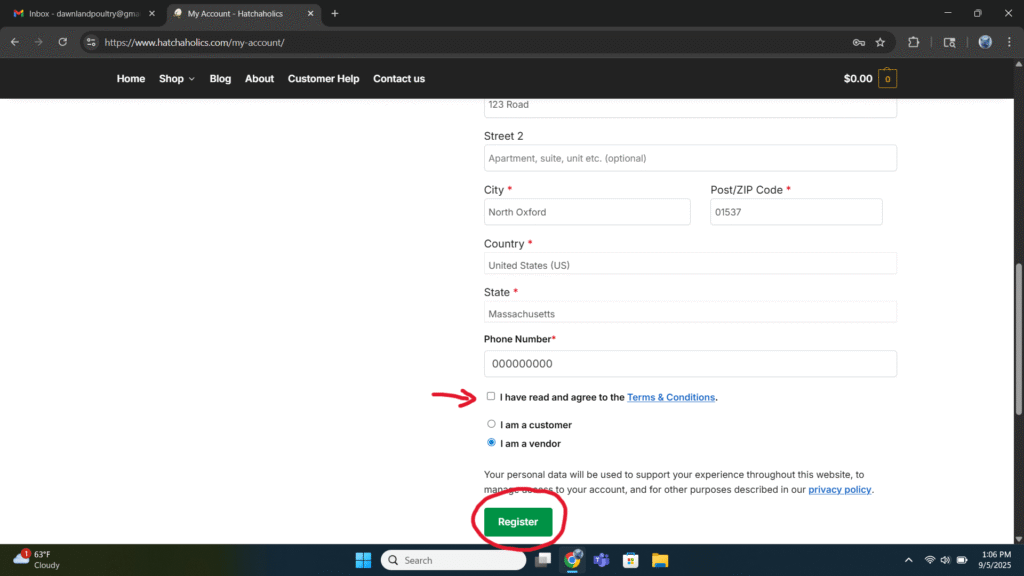
Step 4: Agree to Terms & Submit
✔️ Check the box to “I have read and Agree to Terms and Conditions,” then click Register.
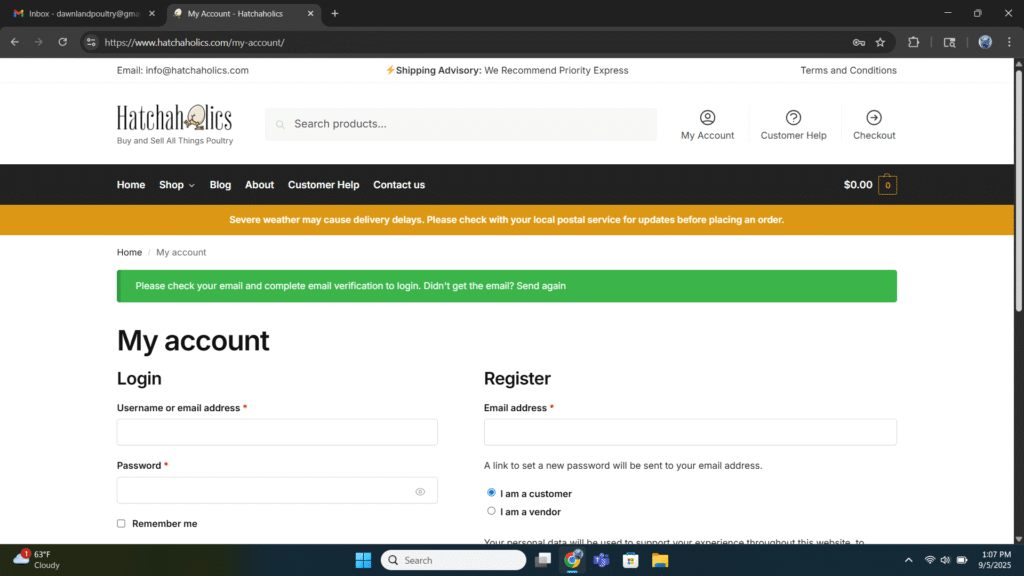
Step 5: Check your Email
Once complete check your email inbox with activation email.
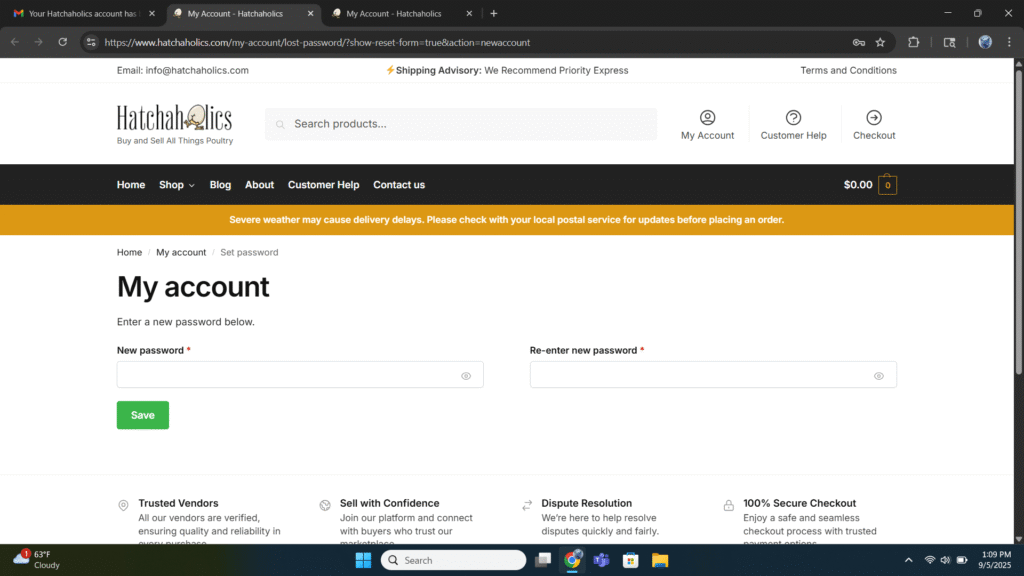
Step 6: Set your password
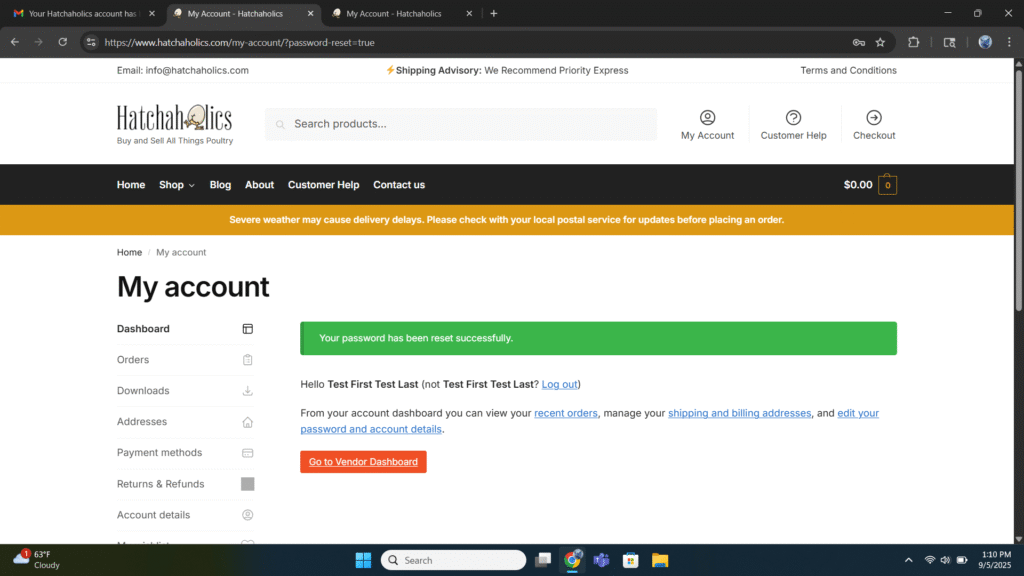
The next step is a two-part process. First, set up your new password. Once your password has been successfully set, you’ll see a green message confirming, “Your password has been reset.” At this point, you can visit your vendor dashboard; however, please note that you won’t be able to publish any products for sale until you complete the second step.
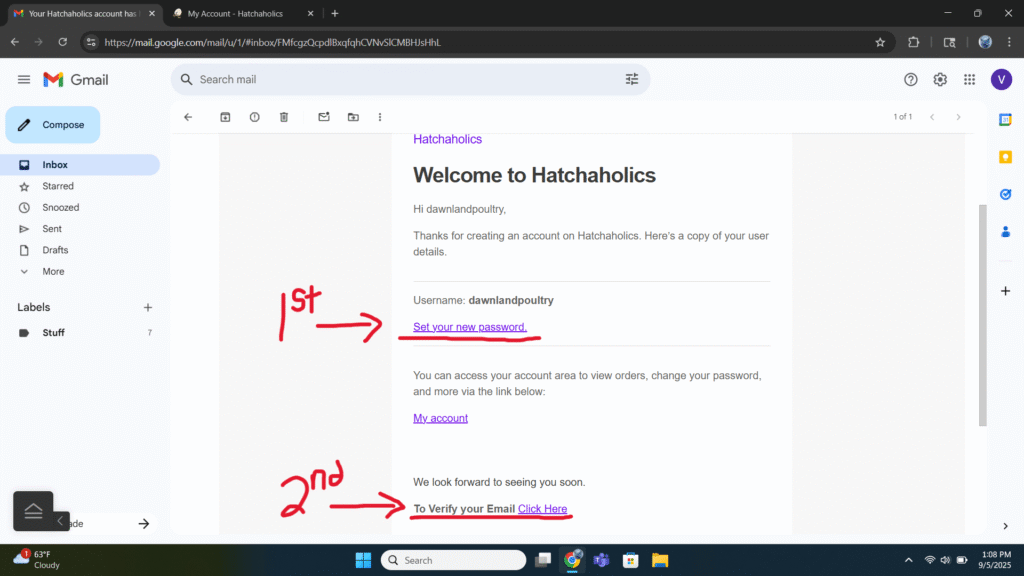
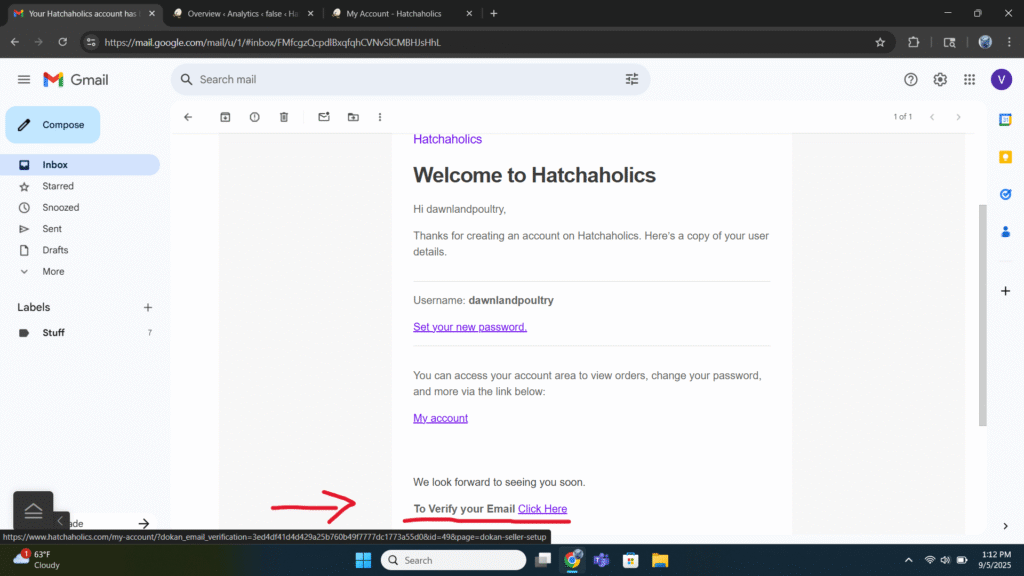
Step 7: Return to your email
Now that you have set your password, you can move on to step 2. Select the “Verify Your Email” option to open the setup wizard. Please note that you won’t be able to add products to your vendor dashboard until this step is completed and your account is fully verified.
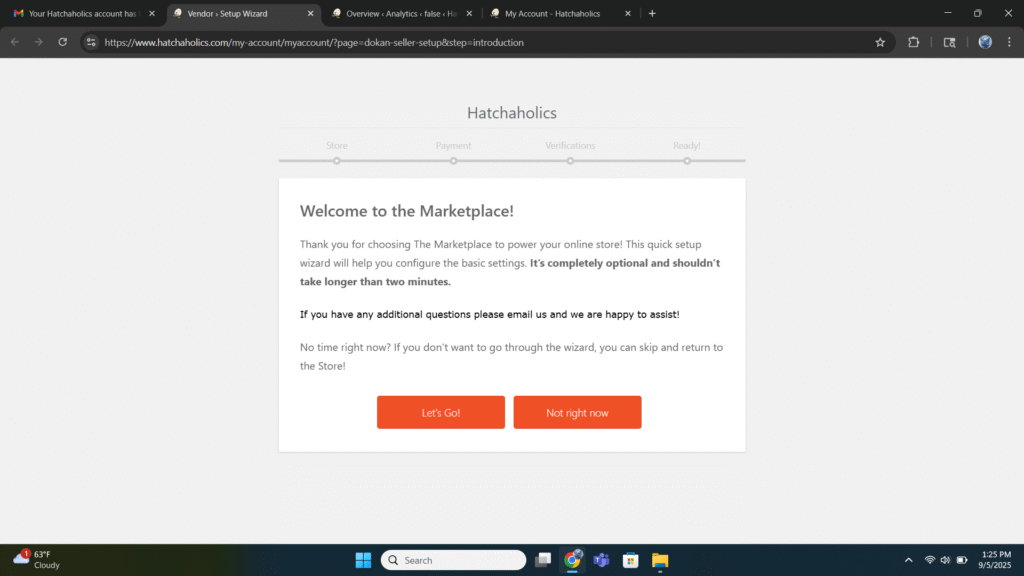
Step 8: Follow the “Wizard”
A new page should open to start the set-up wizard, it takes about 15 mins to complete. If you do not have time you can always come back later. When ready select the “Let’s Go!” button. You will be asked to fill in another form. Please confirm your store’s information, select the products your store carries, and location.

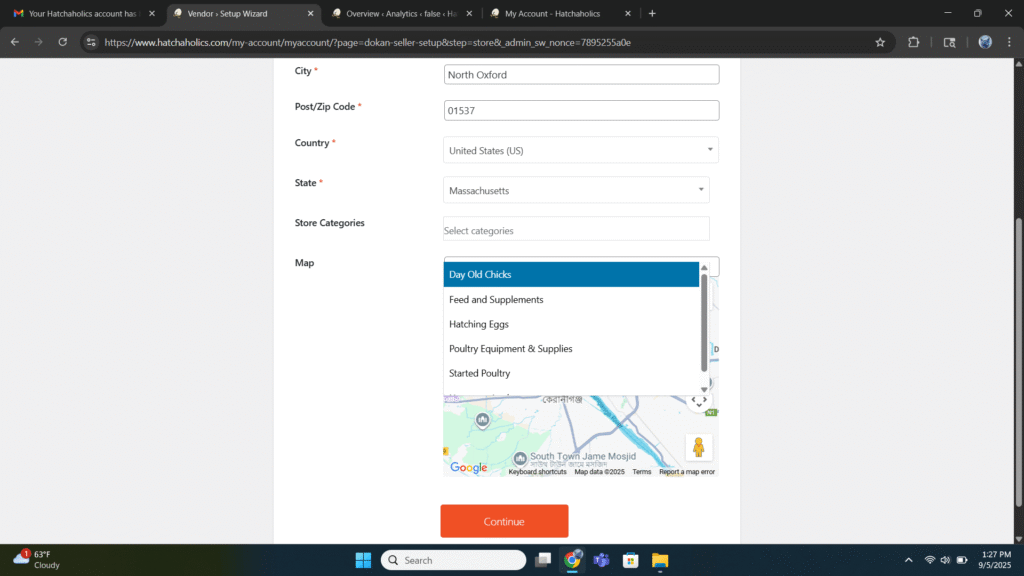
Change Product Catagory
To select the products your store carries, click the “x-uncategorized” button. A dropdown menu will appear—choose the appropriate product categories for your store from the list.
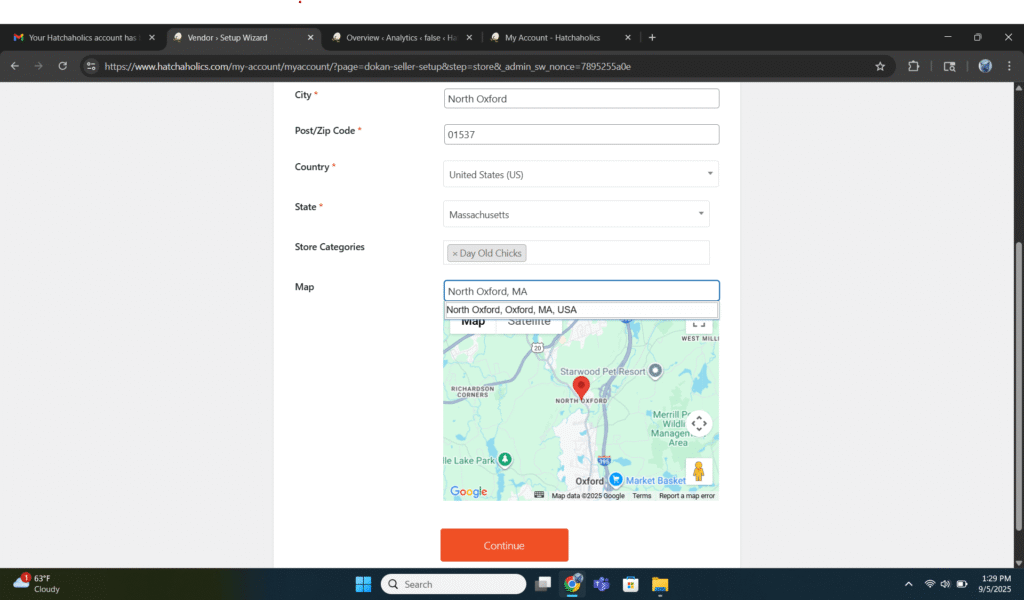
Change Map Location
To change the store location on the map, highlight the default address and begin typing your own. As you type, a dropdown menu with suggested addresses will appear. Select the correct one to properly set your store’s location on the map. When you are done you can hit the continue button for the next step.
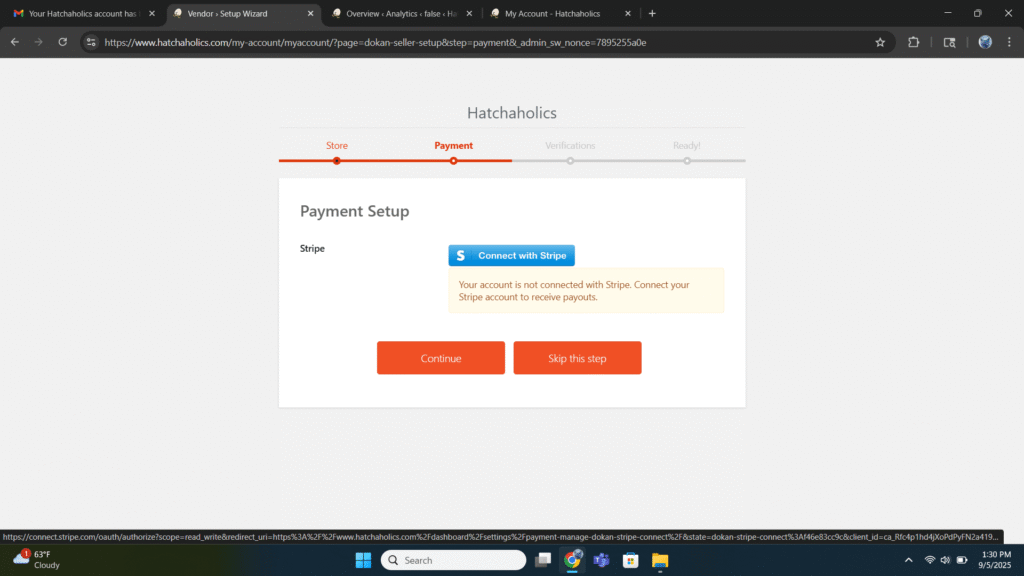
Step 9: Payment Setup
You’re almost there! The next step will take you away from Hatchaholics to set up your Stripe account. We use Stripe to make sure all payments are fast, secure, and fully automated. When you connect your bank account through Stripe, your financial information remains completely private—we never see or store your details.
Here’s how it works:
- When a customer makes a purchase, Stripe processes the payment.
- It automatically splits the payment between you and the marketplace (taking a small commission).
- Your earnings are then sent directly to your bank account according to the payout schedule.
This setup keeps everything seamless and secure, so you can focus on running your store while Stripe handles the payments. If you prefer, you can skip this step for now and connect your Stripe account anytime later through your vendor dashboard.
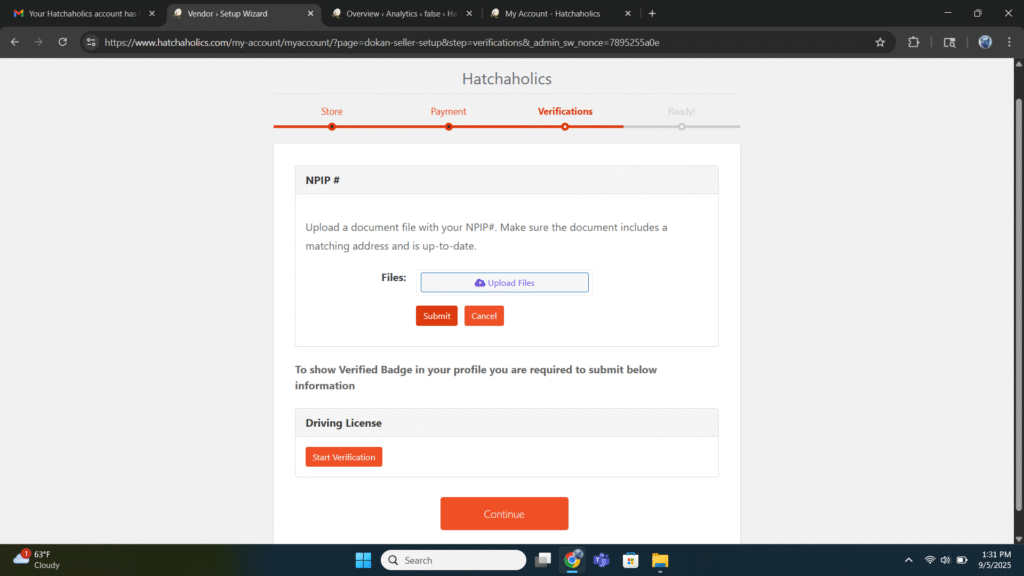
Step 10: Vendor Verification – Upload ID or Address Verification
As part of our vendor verification process, we require documentation to confirm your identity and ensure your offerings align with our marketplace standards.
🐔 Selling Poultry, Hatching Eggs, or Day-Old Chicks?
If you plan to sell poultry or hatching eggs, you must upload a valid form of ID (such as a Driver’s License or official mail) that matches the information provided in your NPIP (National Poultry Improvement Plan) paperwork.
📌 IMPORTANT:
- The name and address on your ID or mail must exactly match your NPIP documents.
- This ensures traceability and compliance with federal and state poultry health regulations.
🛒 Selling Other Poultry Products?
If you are not selling poultry and are only offering other types of products (incubators, poultry shipping boxes, books, etc), you can skip this upload step. However, please email us directly to confirm your product type and proceed with vendor approval.
Verifying vendors helps protect our community, ensures legal compliance, and builds trust with customers. If you skip this step now, you can always upload your documents later through your vendor dashboard.
Congratulations!
You have successfully set up your vendor account at Hatchaholics.com! Your account is now under review, and verification typically takes up to 24 hours. Once verified, you’ll have full access to upload and manage your products.
In the meantime, feel free to explore your vendor dashboard. An intuitive setup guide will walk you through customizing your store, including adding your store name, banner, shipping details, and terms and conditions. This guided process makes it easy to prepare your shop and ensure it’s ready to attract customers as soon as your account is approved.
We hope this tutorial was helpful! If you have any questions, please don’t hesitate to email us at info@hatchaholics.com. We’re always here to assist you with any questions or help you set up your store.